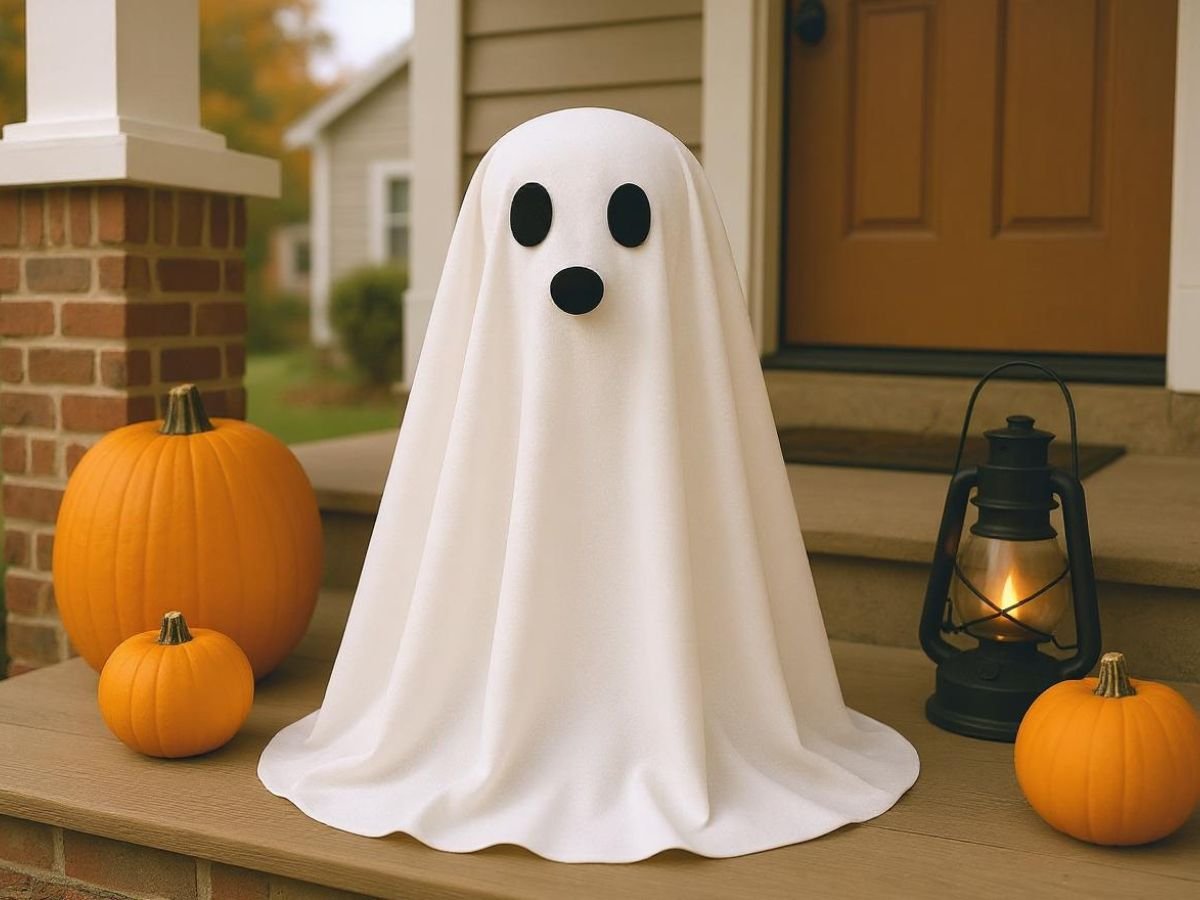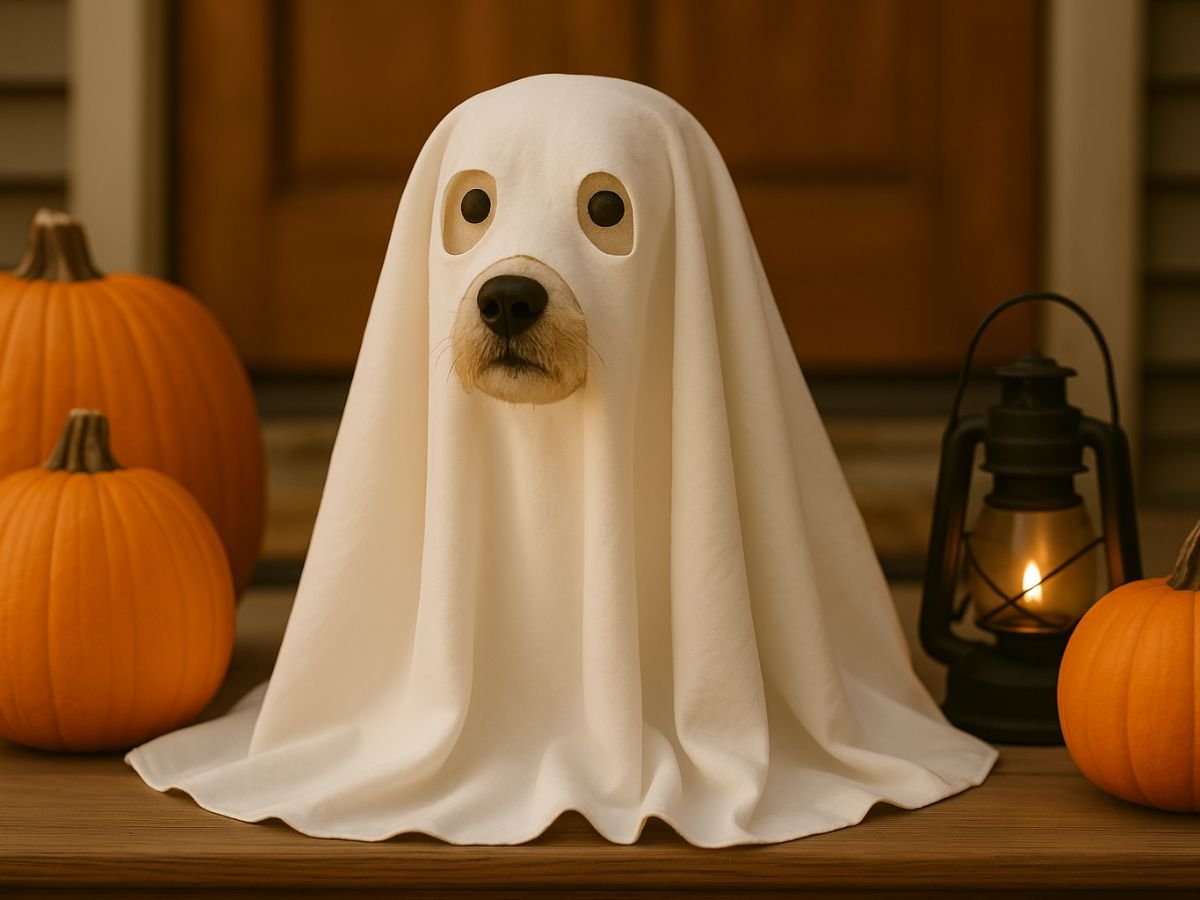
DIY Ghost Dog Porch Greeter for $10 🐶👻 | Halloween Dog Decor
Halloween décor that’s easy on your wallet—and ridiculously fun to make.
Why skip the store‑bought stuff?
Big‑box Halloween displays cost too much, no cap, clog up landfills, and honestly look kinda cookie‑cutter.
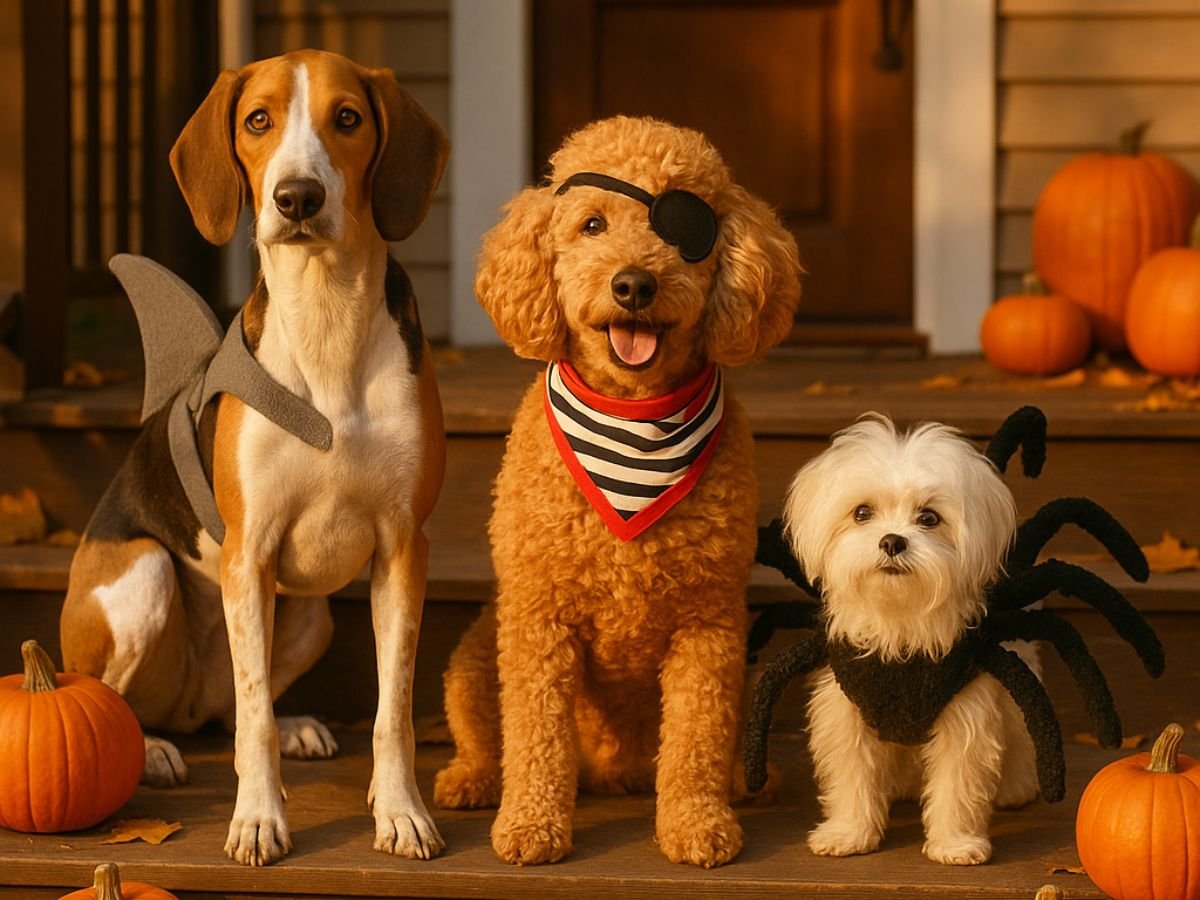
Meanwhile, our dogs are side‑eyeing every cackling witch and plastic skeleton in sight.
Handmade props let you control the vibe (and the budget) while adding a personal story to your porch.
And this DIY ghost dog project totally fits that vibe—big W for you and your wallet.

Monty moment: Last year my Westie, Monty, snatched a neon skeleton hand right off my doorstep and paraded it around the block like he’d won a trophy. Lesson learned: if it’s DIY, at least I can replace the hand for pennies.
The good news
With a few recycled scraps and ten bucks, you can craft a ghostly dog greeter that:
- takes just about an hour of hands‑on time,
- photographs great for Instagram and socials,
- and keeps the Halloween rush feeling personal, not pressured.
Need more spooky inspiration? Check out my other roundup: Spooky‑Cute Dog Ghost Costumes: Fast, Budget, and Glowing Options »
Materials (Choose Smart Substitutes)

Armature / Core (use what’s handy)
- Recycled newspaper or light cardboard boxes
- Upgrade options: 2–3 mm aluminum wire or pool noodles; crumpled kraft paper/foil for head & haunches
- Low‑tack masking or painter’s tape
- Short dowels/sticks or ¾‑inch PVC (2 pieces ≈ 8–10 in) for legs
- Scrap corrugated cardboard (optional base pad)
Paper‑Mâché / Shell
- Pre‑mixed paper‑mâché clay or DIY: 1 part PVA glue : 1 part water
- Newspaper strips or unbleached packing paper
- Optional smoothing coat: lightweight joint compound or air‑dry paper clay
- Mixing tub, gloves (if you’re fancy), old brush
Detailing (totally optional)
- Air‑dry clay for nose & eye rims
- Two ½‑inch black beads/cabochons for eyes
- A pinch of yarn fluff for a scruffy muzzle
Finish & Costume
- White sheet or thrifted pillowcase
- Matte white spray primer (only if the naked sculpture will show)
- Acrylic black & white paint
- Low‑temp hot‑glue gun
- FX: two battery tea lights or a mini LED puck, fishing line anchor, garden stake
Budget tip: Old puppy‑pad cartons make perfect lightweight frames—raiding the recycling bin never felt so heroic—especially when you scoop it from the sale’s bin.
Step‑by‑step build (about an hour hands‑on)
Hands‑on time: ~1 hour
Drying: overnight
Skill level: beginner—no art degree required.

Step 1 – Build the body & core (≈10 min)
- Ball up newspaper for the rump; tape.
- Slightly smaller head ball; flatten one side for a face.
- Roll a torso cylinder; tape rump + head into a gentle sit.
- Tapered neck roll; tape.
- Legs: wrap sticks/PVC; tape under chest, tilt forward a hair. Add paper wedges for “armpits.”
- Snout: foil or tight paper roll; tape and blend.

Step 2 – Paper-mâché time
- Mix glue + water to pancake‑batter thin.
- Dip, squeegee, criss‑cross layers.
- Two to three layers overall; add one extra on legs & snout. Fan dry until hard and cool.

Step 3 – Strength & Smooth (Optional, but nice)
- Trim lumps.
- Smear on thin clay/compound; smooth with damp finger.
- Dry; light sand.

Step 4 – Add the Features
- Thumb indents for eye sockets before it’s fully set.
- Glue in eyes.
- Sculpt a tiny clay nose; poke nostrils.
- Mini yarn beard if you’re feelin’ it.

Step 5 – Paint (Just the Bits That Show)
- Prime if naked sculpture stays visible.
- Matte‑black nose, mouth line, pupils.
- Dry‑brush a hint of gray/white on the muzzle.
- Seal if your porch floods on the reg.
Step 6 – Drape the Ghost Sheet
- Drape sheet so it barely kisses the ground.
- Mark eye/snout; cut small; test; widen.
- Tack hidden glue dots on head/shoulders/rump.
- Ragged hem? Go for it.
- Pop an LED puck underneath—instant glow, and don’t forget to admire it’s spooky vibes.

Step 7 – Finish & Display
- Zip‑tie pup to a discreet stake or seat on cardboard base.
- Light coat of clear matte sealer on exposed paper bits.
- Store sheet separate, keep sculpture dry. (Future you will thank you.)
Monty strikes again: He tried to steal the newspaper right off the worktable mid‑build, so I gave him an empty paper tube as a “decoy.” Crisis averted.
Quick reference
Armature → 2–3 mâché layers → smooth → features → paint → drape → LEDs → seal → done, done.
Upgrades & variations
- Eco‑filler: Mush biodegradable packing peanuts with water for an Earth‑friendly core.
- Tail wag: Slip a thin wire tail under the sheet—extra cute in the breeze.
- Jump‑scare mode: Add a motion sensor that triggers a gentle “woof.” Your neighbors might scream, but that’s half the fun.
- Mega‑breed edition: Scale the frame for big dog breeds like Great Danes or Newfies.
Neighbor anecdote: My friend Anna’s beagle mix barked for a solid minute the first time he saw her sheet ghost—until he caught the scent of his favorite treats hidden underneath. Works every time.
Final Woof
DIY decorations shouldn’t drain your treat jar—or scare the fur off your four‑legged roommate. With recyclables, a dash of creativity, and maybe a Monty cameo, you’ll have a porch greeter that slays on charm.
Snap a pic of your Ghost‑Dog porch greeter and share it with the rest of the world…. let’s flood those feeds with spooky pups!
Happy haunting, y’all—and happy crafting!
And don’t forget to check out my Pinterest page for more dog inspiration!
FAQs About DIY Ghost Dog Porch Greeter
1. How do I store the sculpture for next year?
Let the pup dry completely, lift off the sheet and fold it. Wrap the paper‑mâché body in acid‑free tissue or a clean pillowcase, and stash it in a cardboard box up in the attic. Keep it dry so you can haunt again next year.
2. Will this freak out my own dog?
Usually not—especially if you let your pup sniff around while you’re building. Monty mostly ignored it once he realized it didn’t dispense snacks.
3. What if it rains on Halloween night?
Give exposed paper a coat of exterior‑grade sealer and keep your Ghost‑Dog under a covered porch. Folks in rainy states might add a clear umbrella.
4. Can I adapt the sheet for different dog breeds?
Totally. Make it longer for a dachshund vibe or trim the snout holes for boxers and pugs.
5. Could I use glow‑in‑the‑dark paint instead of LEDs?
Yep—just grab a non‑toxic craft formula. Double‑check the label like you would a kid’s art supply.